Thursday, 3 March 2016

Project Brief

10. A short film in its entirety, lasting approximately five minutes, which may be live action or animated or a combination of both, together with the following options:
• a poster for the film;
• a film magazine review page featuring the film.

Wednesday, 2 March 2016

Tuesday, 1 March 2016

Monday, 29 February 2016

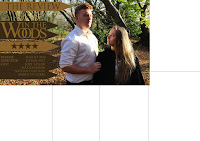
'In The Woods' - Double Page Spread


This is the final double page spread to accompany the launch of my short film 'In The Woods'. 

Sunday, 28 February 2016

Evaluation - Question 1

In what ways does your product use, develop and challenge 
forms of conventions of real media products? 

Saturday, 27 February 2016

Evaluation - Question 2


How effective is the combination of your main product and ancillary?


Thursday, 25 February 2016

Wednesday, 24 February 2016

Evaluation - Question 4

How did you use new media technologies in the construction, 
research, planning and evaluative 
stages? 


Wednesday, 6 January 2016

Film Progression 3 - Continuity Sounds

I became increasingly aware that, to make the continuity editing of my film work, I should layer constant sound over the top - to continue nuance and stature. I knew that, in order to change a sense of time and location, the background noise should change and have different tones. 


For Scene 1, I used the sound of water to exaggerate the fact that they were by a lake and in nature. By not breaking the naturally recorded noise at all, means that – though the sound differs little from frame to frame – the viewer can be slightly more involved and integrated into the world of the diegesis. This means that the continuity editing is backed up by sound and, of course, the two aspects should work together. My timeline ending up looking like this: 


For Scene 2A, I decided that, as this was a scene of love and lust, that the sounds of the woods should be based around the already existent sounds of leaves and then additional birdsongs. The birdsong connoting a sense of freeness and liberality – both of which Charlotte feels by escaping convention and seeing her lover in the woods. I made sure that the layers of this noise did not overpower the speech of the characters by playing around with the volume of the music. My timeline ending up looking like this, for this section: 


For Scene 2B, I knew that the sounds needed to be harsh and dramatic. In continuation with the birdsong of the scene prior, I knew that I wanted to have birds present. However, instead of innocent, happy birdsongs – I chose the sounds of ravens and crows. Traditionally, these denote death, terror and the warning of danger (founded within the Gothic). This kind of danger seemed to fit the content of the scene, as James dies, and Johnson is seemingly the tyrannical patriarchal figure. My timeline ending up looking like this, for this section: 


Film Progression 2 - The Importance of Music

I became increasingly aware that the silence of the titles and transitions was not professional or interesting for viewers. As in my case studies, music sets the mood and nuance for the entire scene to follow and can be unsuccessful without it. 

I knew that I wanted music for transitions and titles in order to create a sense of love, longing, drama and anticipation. I went onto royalty free music website 'Incompetech' and found options. 

These were the possibilities for transitions and titles: 


1


2


3


1. I felt that this was beautifully sensitive, calm and intriguing. The fact that light piano notes are used in isolation has a sense of vulnerability and many of the period dramas I have studied show that this effect causes an audience to care for the female protagonist. However, as this was being used for the beginning and end of the film – I felt that I needed a strong accompaniment that made the audience feel a sense of importance and drama. This piece was too forgettable and soft to have a lasting impression.

2. This piece was, similarly, lone piano notes and chords. I felt that its pace had a rather solemn and slow tension to it that made the listener wonder ‘why?’. However, in similarity to the comments above – this was also forgettable and lacking in vitality and essential drama.


3. At the moment of hearing this piece I knew it was what I wanted to use for my film. This is because the long drawn-out extended string instruments create tension and anticipation due to their subtle yet strong nature. I also felt that it wasn’t too dramatic within its own right. It works in combination with the visual and not in isolation. 


Film Progression 1 - Sound Development


In order to ensure clarity of continuity, I watched the first draft of my short film in complete isolation - without stopping or starting - and just made notes. These are the notes I made: 


In summary, these notes are points of reference that highlight moments where sound issues are dominating for the viewer. These issues mainly consisted of awkward silences, loudness or complete silence. The main thing I am going to do to combat these issues is to add layers of background over the top, essentially sound bridging, to ensure that the continuity editing of my piece was strong and effective. 

This is a copy of the first, complete, draft of the film:


Monday, 4 January 2016

Double Page Spread Progression 2 - Second Attempt

12

34

56

78


1. To make sure that the proportions and alignment of my product were accurate, I used Photoshops ruler, rectangle and grid tools to give myself a basic outline to the columns of piece for when I was developing the text and images placement on my double page spread.

2. Before discussing where I placed the image on the document, I should outline why I decided on this image in general. This was one of my favourite images and was a contender for the leading image of my entire packet (my poster). Here are the main reasons I chose this for the double page spread:
  • The image has striking colours as a background.
  • The clashing of the black and white outfits of the two actors cause drama and contrast of characters, causing intrigue for potential ticket-buyers.
  • The pose of the actors is incredibly striking. By having Jodi look up at Max, there is a sense of power struggle and dependency which makes us, very simply, ask: why?
  • The space to the left hand side, originally intended for the films logo, leaves perfect space to put text about for the films review and small print. This is important because I feel, as the image is strong enough, the text will not distract from the images dominance over the article.

I placed the image where I did because many of the double page spreads from film magazines I had looked at had the image larger than a quarter and to the side – allowing a column of text on the other side.

3. Brand synergy is, of course, very important. Therefore, I used precisely the same typography as I did for my poster, logo and film titles when developing my double page spread. As in recent years, the films brand demands the house style of the double page spread. So, to make it clear that this is from an external media outlet – I used the title 'THE REVIEW' to indicate this. I made the containers of the text, arrows instead of rectangles as it made the space feel more intricate and thought-out.

4. In order to be in-keeping with convention and to make the layout of my text more engaging to the reader, I set out my pull quote before adding in the actual bulk of the article to ensure that the placement of the pull quote was central and in a successful place.

5. The most important choice that I made in context to the arrangement of the text of the article, was that I chose to make it fully-aligned. Conventionally, most magazines are either left or rightly aligned according to the image and layout of the entire article. I decided that due to the traditional nature of my genre and the formality of my branding, that this was more in-keeping and reinforcing of the inherited, traditional nature of my product.

6. I was in two minds about filling the entire right column with text as I felt that it would look too affronting or full for the average reader and I wouldn't want to scare of potential audience viewers just because of extensive text. Therefore, I thought that placing an image in the lower right-hand corner would solve this problem and make the article feel more interactive. I chose this image as it included a different character but mainly because the colours develop as the image progresses (vertically) and does not steal the attention away from the romance in the feature article photograph.


7. For the final touches, I removed my identifying rectangles as a point of reference. I also realized that, in order to make it clear of what medium I was working in, that I should include page numbers and other footnotes. In cohesion with my entire ancillary, I continued to the same typography. I also made sure that the text was smaller than that of the article text, so that it was the least of the readers worries or distraction. I also removed the box that the pull quote was in to make the bulk/body of the text feel more professional and subtle.

8. In retrospect, after viewing the document a week after completion, I realized that the text wasn't readable enough for my genre, form or demographic. So, in final stages, I changed the colour of the text to the darker brown, instead of the gold, that was already present. 

Double Page Spread Progression 1 - First Attempt

12

34

56


1. I chose this image as the background to my double page spread and that I would layer my text over the top because many of my studies have shown this as conventional when dealing with films that are visually leading. Not to mention, I felt the image was incredibly fitting for the nature of my film and communicated that this was a pastoral love story which my potential audience should be initially aware of. However, due to the way the shot was taken – I felt that the image was slightly too dark for a feature article photograph so I thought I’d try and see what I could do with editing.

2. To make sure I had a good grip of how it would look once it was an article, I decided to quickly use the rectangle tool to see where the text would be in context to the image. As I was happy with these proportions, I continued with editing the problematic image.

3. Firstly, I cut out one of my actors using the lasso tool and made him another layer. In order to assure high quality standards, I ended up performing this several times until I was happy with the way I had manipulated the form.

4. Once extracted, I used the image tool to try and lighten the subject, to make him more clear and to make him stand out from the background. However, I was very aware that the background was still too-light and colourful for this to make enough of an impacting difference. I also felt that it made the colours on Max look washed-out and less vibrant.

5. After cutting out and extracting Jodi from the background, I darkened the background layer in order to make the subjects stand-out of the photograph more. I did this because the drama of the two characters poses should be the leading part of the double page spread. Yet, I felt that this made the colours feel dull and not intriguing. And if there is anything I have learned from my study of the period drama and it's related ancillary, is that though the branding is muted and subtle – it it certainly not dull or boring.

6. In a final attempt to see if this image and layout was going to work, I tried to use airbrushing and further image manipulation to try and make my subjects pop. However, I felt that by making them dominant in context to the article, we lost the professional and subdued nature that the period drama and demands. This is because they look washed out and slightly alien to their background when, in fact, they should look completely at home in their environment – like they do in my poster. So, in order to ensure brand synergy and professionalism, I decided to use a different layout and image that felt stronger and more integral to my brands development.